Ok... now start the staff Part 2
Ok, I now had a gem to use as a template. Obviously this looks nothing like what I want since it just looks like shaped clay.
Now comes time to make the mold.
I started by trying to use the latex I already had since that is known to work. Well it didn't work for me. The stuff took too long to dry and I had to apply so many coats to get a mold that was thick enough to keep its shape and be able to be used.
Next I looked at a gel substance that they use in the Memory Hands keepsake kit. It looked like it may work and it was quick setting. Little did I realize how quick. My first attempt at using this stuff was a disaster. It says on the box that it sets in 3 minutes and they are not lieing. It started setting even before I could get the gem completely covered. Its designed for one person to mix as the other people have their hands ready to be molded. My second attempt worked much better but then I found that I couldn't get the mold apart properly to remove the clay gem. The gel would flake apart too easily.
I can't complain about the product itself it really wasn't meant to be used the way I was working with it and just wasn't going to work for me.
Finally I threw in the towel and went the traditional route.
First I added a clay wall around 1/2 of the gem. This is going to allow me to create 2 separate halves of the mold.

Next I covered the entire half of the gem with Vaseline. This acts as a 'release agent' and will keep the plaster from sticking to the gem. Note that they make professional release agents but I wasn't able to find any locally and for what I need this will work. Don't use this if you make something with a lot of detail.
Then comes the pouring on of the plaster.
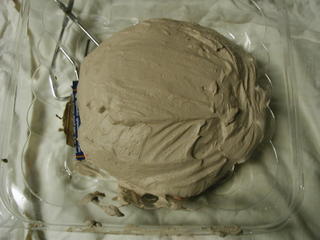
Once it sets I removed the clay separation piece and covered the other side with Vaseline. This includes the set plaster because you want to try and keep the two halves from sticking together.
I also added the little piece of clay to keep an opening because once I am done and have removed the clay gem I need a spout to be able to add the material that will become the gem.

This side has been covered in plaster(not shown) and I'll know tomorrow when its set if I've done this correctly or not. The real challenge comes in trying to separate the two halves of the mold to get out the clay gem without damaging them.
Once I have the mold complete I'll do some light sanding to make sure everything is smooth inside and then I will be using Polyester Casting Resin that will be tinted red to make the gem.
Oh and in case you are wondering the standard 12 sided gem is technically known as a bipyramid polyhedron
Now comes time to make the mold.
I started by trying to use the latex I already had since that is known to work. Well it didn't work for me. The stuff took too long to dry and I had to apply so many coats to get a mold that was thick enough to keep its shape and be able to be used.
Next I looked at a gel substance that they use in the Memory Hands keepsake kit. It looked like it may work and it was quick setting. Little did I realize how quick. My first attempt at using this stuff was a disaster. It says on the box that it sets in 3 minutes and they are not lieing. It started setting even before I could get the gem completely covered. Its designed for one person to mix as the other people have their hands ready to be molded. My second attempt worked much better but then I found that I couldn't get the mold apart properly to remove the clay gem. The gel would flake apart too easily.
I can't complain about the product itself it really wasn't meant to be used the way I was working with it and just wasn't going to work for me.
Finally I threw in the towel and went the traditional route.
First I added a clay wall around 1/2 of the gem. This is going to allow me to create 2 separate halves of the mold.
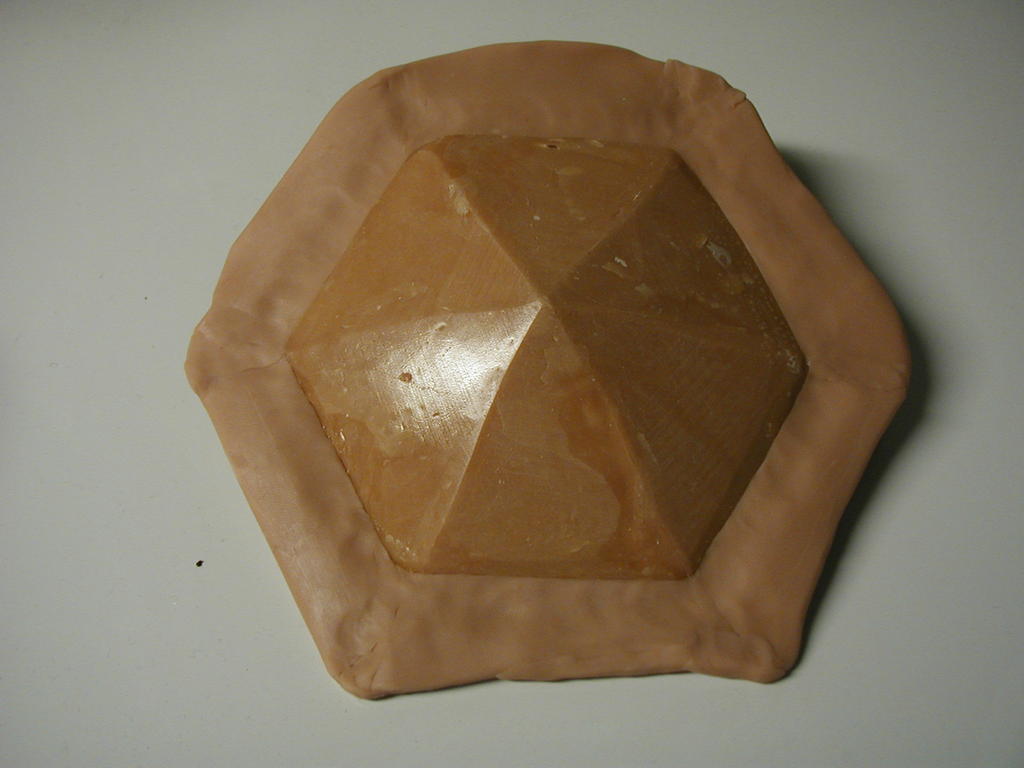
Next I covered the entire half of the gem with Vaseline. This acts as a 'release agent' and will keep the plaster from sticking to the gem. Note that they make professional release agents but I wasn't able to find any locally and for what I need this will work. Don't use this if you make something with a lot of detail.
Then comes the pouring on of the plaster.

Once it sets I removed the clay separation piece and covered the other side with Vaseline. This includes the set plaster because you want to try and keep the two halves from sticking together.
I also added the little piece of clay to keep an opening because once I am done and have removed the clay gem I need a spout to be able to add the material that will become the gem.

This side has been covered in plaster(not shown) and I'll know tomorrow when its set if I've done this correctly or not. The real challenge comes in trying to separate the two halves of the mold to get out the clay gem without damaging them.
Once I have the mold complete I'll do some light sanding to make sure everything is smooth inside and then I will be using Polyester Casting Resin that will be tinted red to make the gem.
Oh and in case you are wondering the standard 12 sided gem is technically known as a bipyramid polyhedron
posted by Unfriendly Pedestrian at Tuesday, October 18, 2005
![]()
![]()


3 Comments:
...and what you're specifically constructing is a hexoganal bipyramid
you are hard core.
the closest i've come to doing anything this hardcore was when I made my gun holsters for my lora croft costume a few years back (which, in case you are wondering, was super kick ass).
you and glitzy are gonna have so much fun. I can't wait to see the finished costume!
Such a nice complement. Most people just call me anal and obsessive.
I'd like to see your costume. It's fun to see how other people solved their quandaries when faced with a challange.
Post a Comment
<< Home