Time to make the 'gem'
OK, time to get the mold ready.
Removing the original clay gem from the mold went pretty easily.
The down side of using Vaseline is that the uneven coating you get with it transfers to the mold shell. !! BIG MISTAKE !! - NEVER USE VASELINE as a mold release agent. It works but produces CRAP!
After cleaning off the extra Vaseline I had to put the mold in the oven at low heat (~170) for about 2 hours. I wanted to make sure that the mold was completely dry and the inside surface was still damp. Plaster achieves over 95% of its strength in the last 10% of its drying and it is a sharp increase of strength, so if it was only 70% dry then it would only have about 20% of its strength.
After trying to sand the inside of the mold to smooth out the Vaseline marks, I put it back together. I realized that there was some small gaps in the mold and so I used the clay from the prior steps to make sure and seal the mold.
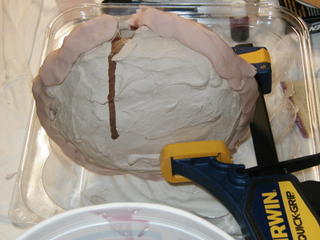
I then made my mix. First making a guess as to the amount of resin I'd need (25 oz) and add the coloring. Once that was mixed I added the hardener. I then filled the mold and tossed the extra. !! BIG MISTAKE !!
I needed to wait for the resin in the mold to settle and add more to the mold before I was done. So, I had to run out to the dumpster and retrieve the bucket.
This is what's left after my pour.
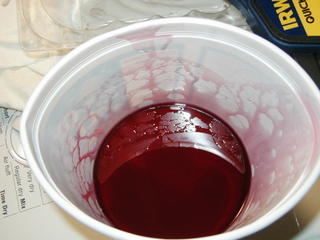
I started this Thursday night and Friday night I removed the leftovers from the bucket. It was still a little soft and I could leave my fingerprints in the resin.
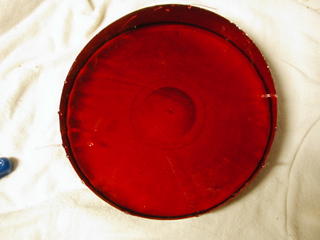
Well I waited till Saturday to remove the gem. One half came off easily enough but the other half had to be broken off. It seems that I didn't put enough of the silicon spray on one side (in place of the Vaseline).
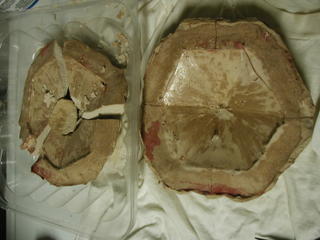
Well the gem was still soft on the surface. Since its been cool in the basement I decided to put the gem in the oven to test if the increase in temperature would help the chemical process. I left it in there for about 5 hours at ~150. I'm not sure if it helped. It was finally solid by Sunday night.
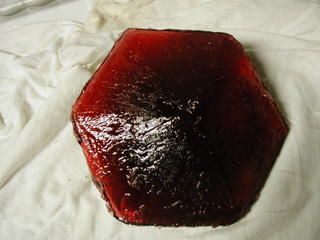
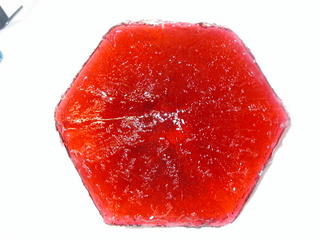
Below is how it looks. Like crap. The second picture was taken with the flash.
Well, as this was setting over the weekend I turned to finishing up the staff head and more.
Later will come the sanding and polishing of the gem.
Removing the original clay gem from the mold went pretty easily.
The down side of using Vaseline is that the uneven coating you get with it transfers to the mold shell. !! BIG MISTAKE !! - NEVER USE VASELINE as a mold release agent. It works but produces CRAP!
After cleaning off the extra Vaseline I had to put the mold in the oven at low heat (~170) for about 2 hours. I wanted to make sure that the mold was completely dry and the inside surface was still damp. Plaster achieves over 95% of its strength in the last 10% of its drying and it is a sharp increase of strength, so if it was only 70% dry then it would only have about 20% of its strength.
After trying to sand the inside of the mold to smooth out the Vaseline marks, I put it back together. I realized that there was some small gaps in the mold and so I used the clay from the prior steps to make sure and seal the mold.

I then made my mix. First making a guess as to the amount of resin I'd need (25 oz) and add the coloring. Once that was mixed I added the hardener. I then filled the mold and tossed the extra. !! BIG MISTAKE !!
I needed to wait for the resin in the mold to settle and add more to the mold before I was done. So, I had to run out to the dumpster and retrieve the bucket.
This is what's left after my pour.

I started this Thursday night and Friday night I removed the leftovers from the bucket. It was still a little soft and I could leave my fingerprints in the resin.

Well I waited till Saturday to remove the gem. One half came off easily enough but the other half had to be broken off. It seems that I didn't put enough of the silicon spray on one side (in place of the Vaseline).

Well the gem was still soft on the surface. Since its been cool in the basement I decided to put the gem in the oven to test if the increase in temperature would help the chemical process. I left it in there for about 5 hours at ~150. I'm not sure if it helped. It was finally solid by Sunday night.
Below is how it looks. Like crap. The second picture was taken with the flash.


Well, as this was setting over the weekend I turned to finishing up the staff head and more.
Later will come the sanding and polishing of the gem.


2 Comments:
This is a wildly belated comment, I know, but I was wondering, what sort of coloring did you use with your resin to get that deep red hue?
Thanks!
Hey,
For this project I used Castin' Craft Clear Polyester Casting Resin from Michael's and they have a red transparent dye. I believe that they sell the dye as part of a 3 pack of blue, yellow and red. I used A LOT of the dye (about 25% of the bottle) as I wasn't sure how much was needed and I had never done it before.
From what I know now, what you see when you mix the resin will be darker in the cup than the result you get after the resin has set. However, keep in mind that I also now know that you will compromise the strength of the final product if you add too much dye to any resin regardless of the manufacturer.
This gem was always a little soft and I could press my fingernail into it. Its likely because I added too much dye.
If you want a quick prop and it won't matter how long it lasts then this is ok but if you want something that will last for a long time then I suggest you make a couple of small test batches and experiment with how dark it gets.
I've since been using the Crystal Clear resins and So-Strong pigments from Smooth-On and they have been working really well. I really like their fluorescent ones and how they glow under black-light.
Post a Comment
<< Home