Headpiece and more...
Ok, so while I was waiting for the gem to set over the weekend I worked on a couple of other things.
I cleaned up the tongue on the belt sander. (works ok as long as you don't let it heat up)
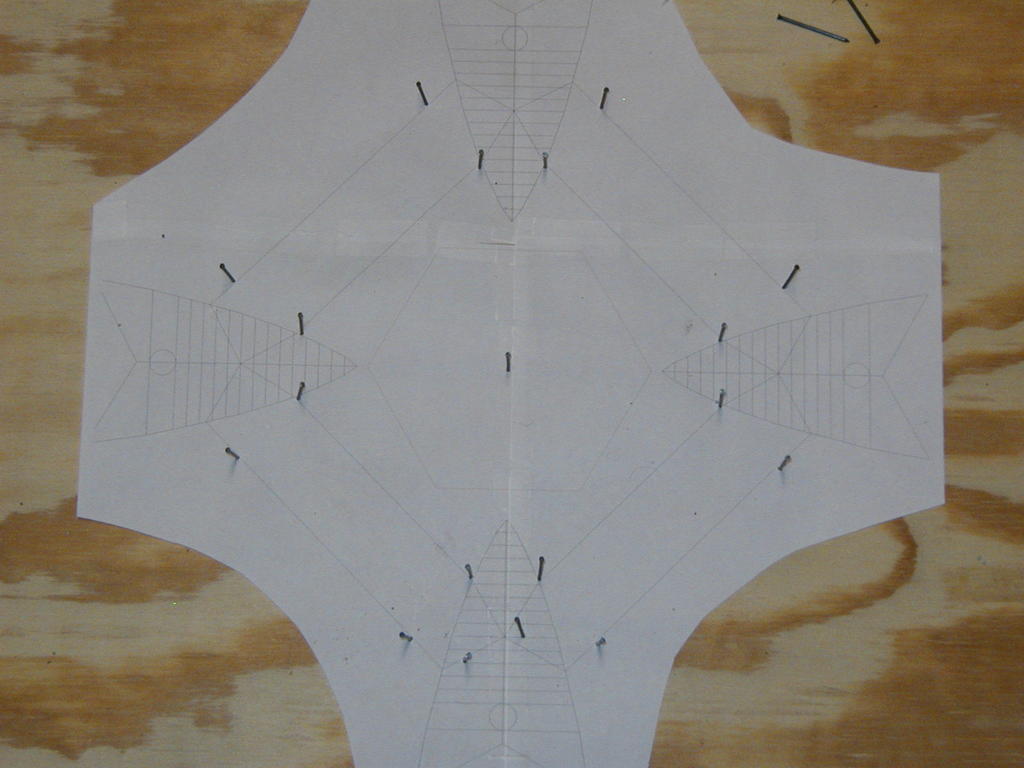
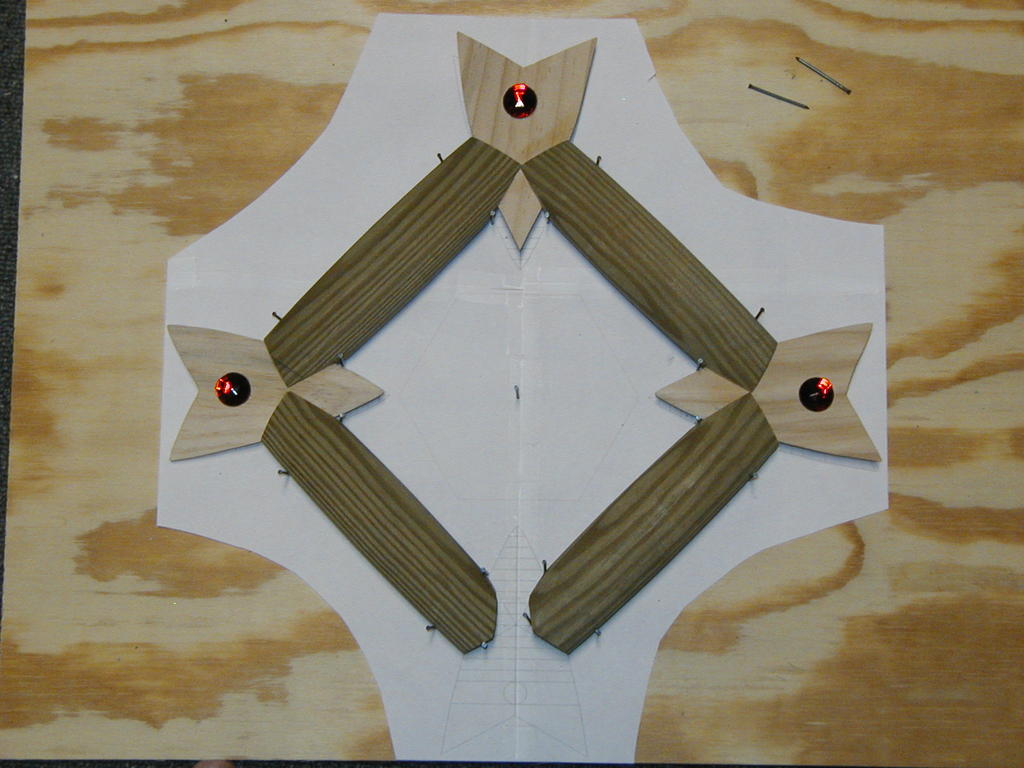
I also worked on the headpiece. I wasn't sure how to fit the pieces together and make sure that it kept its shape. So I made a printout of the headpiece and placed it on a piece of plywood.
I then added some nails in the right locations to create a crude form.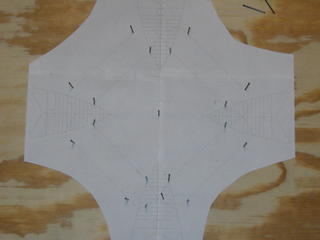
Then add some wood and glue and viola. Notice the small plastic gems I added to cover up the holes that are evident in my previous post showing the sample layout.
It took a while to get it to this point because there was a lot of trial and error with the fitting of the pieces. I had to sand a little, then test the fit, sand some more and repeat.
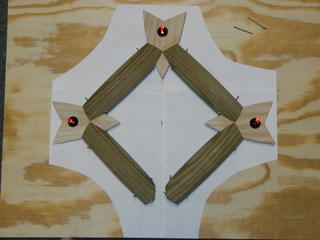
If you look at the two ends of the pieces at the bottom you will see that they do not match up well. This is result of sanding these pieces with only a little experience and being in a bit of a rush. I point it out hoping that you avoid my mistakes and take your time if you try to do anything like this. (btw, I will be able to hide this flaw later.)
I'll add the bottom to the headpiece once this glue is dry. I can't add it now because its depth is greater than the other pieces and would throw off the layout.

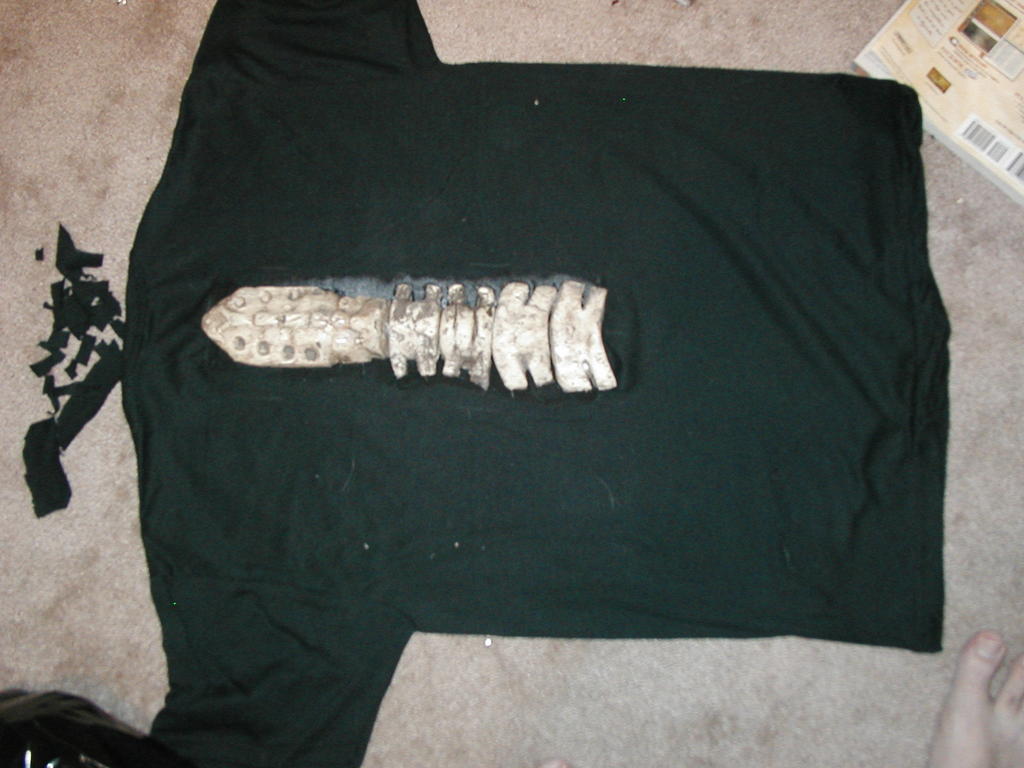
I also worked on another piece of the outfit. What you can't see in the original picture of Malaise that I posted is that his spine is protruding from his back. So I need to make something for this.
I purchased a 'Bag of Bones' and used the parts to create a spine. Actually these bones were fully formed pieces so I had to take them and cut them in half.
I did this so that I could mount the pieces and have them look like part of them was protruding.
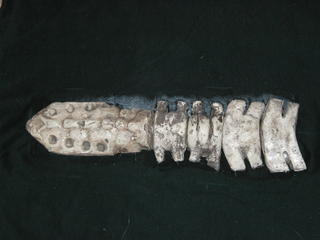
These bones are made out of styrofoam and covered with a plastic paint. I mounted them onto a piece of shaped scrap cardboard with glue special for the foam and is similar to white craft glue.
I then made sure to color the cardboard with a black marker to cover up any mistakes from the next step.
I then inserted the 'spine' into a black t-shirt that I plan to wear under my robes. I initially cut the shirt with a basic "I" incision. I then took the two halves and cut them to closely outline the spine. I glued the shirt to the cardboard using simple white craft glue.

What I will do is to cut the robe and fray the edges of the cut so that the spine pokes through but not as cleanly as it does in the t-shirt. I can use white glue to actually 'hem' the robe so that the cloth doesn't unravel. It will make the robe stiff where it is applied but if used sparingly it will not effect the fit or flow of the robe and easier than trying to sew a hem.
I cleaned up the tongue on the belt sander. (works ok as long as you don't let it heat up)
I also worked on the headpiece. I wasn't sure how to fit the pieces together and make sure that it kept its shape. So I made a printout of the headpiece and placed it on a piece of plywood.
I then added some nails in the right locations to create a crude form.
Then add some wood and glue and viola. Notice the small plastic gems I added to cover up the holes that are evident in my previous post showing the sample layout.
It took a while to get it to this point because there was a lot of trial and error with the fitting of the pieces. I had to sand a little, then test the fit, sand some more and repeat.
If you look at the two ends of the pieces at the bottom you will see that they do not match up well. This is result of sanding these pieces with only a little experience and being in a bit of a rush. I point it out hoping that you avoid my mistakes and take your time if you try to do anything like this. (btw, I will be able to hide this flaw later.)
I'll add the bottom to the headpiece once this glue is dry. I can't add it now because its depth is greater than the other pieces and would throw off the layout.

I also worked on another piece of the outfit. What you can't see in the original picture of Malaise that I posted is that his spine is protruding from his back. So I need to make something for this.
I purchased a 'Bag of Bones' and used the parts to create a spine. Actually these bones were fully formed pieces so I had to take them and cut them in half.
I did this so that I could mount the pieces and have them look like part of them was protruding.

These bones are made out of styrofoam and covered with a plastic paint. I mounted them onto a piece of shaped scrap cardboard with glue special for the foam and is similar to white craft glue.
I then made sure to color the cardboard with a black marker to cover up any mistakes from the next step.
I then inserted the 'spine' into a black t-shirt that I plan to wear under my robes. I initially cut the shirt with a basic "I" incision. I then took the two halves and cut them to closely outline the spine. I glued the shirt to the cardboard using simple white craft glue.
What I will do is to cut the robe and fray the edges of the cut so that the spine pokes through but not as cleanly as it does in the t-shirt. I can use white glue to actually 'hem' the robe so that the cloth doesn't unravel. It will make the robe stiff where it is applied but if used sparingly it will not effect the fit or flow of the robe and easier than trying to sew a hem.
posted by Unfriendly Pedestrian at Tuesday, October 25, 2005
![]()
![]()


1 Comments:
this is hugely intriguing. I wish I had enough patience as you. Be sure you and glitzy take a pic of the finished product! I want to see the whole thing put together (and her costume too!)
have a good trip!
Post a Comment
<< Home