Thursday, November 03, 2005

Some final thoughts...

If you ever want to do something like this yourself I suggest you aim higher than you think you can achieve. I had little or no idea what I was doing for most of this (and I think it shows) but I do read a lot.

The one thing that I needed more of was time. With time you can plan and develop your ideas to reduce the likelihood of problems. You will also have the opportunity to correct your mistakes.

Things you should have on hand for any project that may come up:

A good Respirator Mask. Protect yourself from sanding/polishing dust, paint fumes, chemical fumes, etc. You wont realize you need one of these until you end up sick for a couple of days because you inhaled some crap this would have stopped. (If your lucky you will only get sick for a couple of days.) You would most likely not need this for simple wood cutting/sanding but watch out if you use any specially impregnated materials.

Get a good pair of Vise-Grips (get the true named Vise-Grips not some cheap knockoff). They will be useful for many things and once you buy a pair you'll be glad you did.

Get a good Bar Clamp. One that has the screw type adjustment. Only get the quick setting type if you have minor things to set and don't need to guarantee a good tight clamp.

A good X-acto Knife set.

A simple Soldering Iron. Get either a couple of cheaper ones or a good one with replaceable tips. That way you can solder electrical connections with one tip and use another for simple wood burning projects.

Lastly keep a 'Parts Bucket'. It doesn't have to be a bucket but keep a box or something where you can keep the scraps and castoffs as you work. You never know when you'll need an extra piece of wood to brace something or an extra piece of leather to tie something down, etc.
Finished? Bwahahahahahaha.....

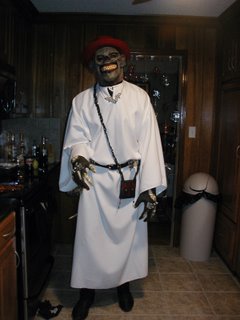
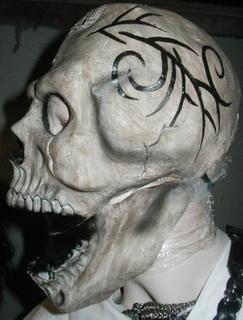
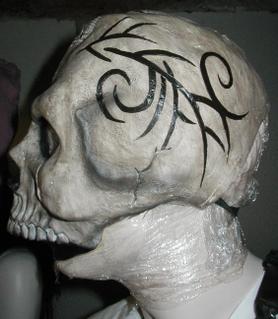
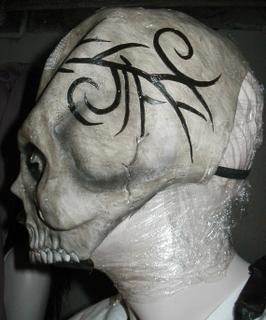
Well here is the final result of the costume.

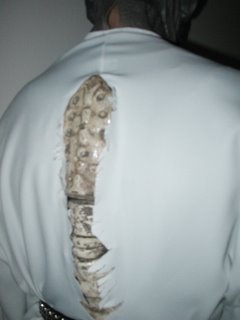
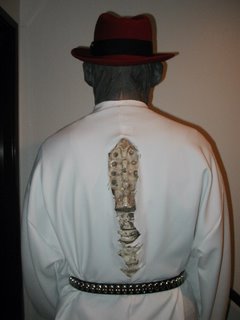
Things didn't turn out exactly as I had planned that's why I am starting with the back of the costume on this post.

I was not able to use the original mask/tongue idea for the costume. We got pressed for time when setting up the party decorations and I did not have the time to get it on.

In order to get it all set up I was going to have to apply a bald cap to cover up my hair in the back and glue it down. Then apply the mask itself and glue it down. I would then have to apply some latex to the edges of the mask to blend it into my skin and the bald cap. Next I'd have to glue the tongue to my neck and then apply makeup to everything. I didn't have the time for all of that so I ended up using my 'backup mask'.

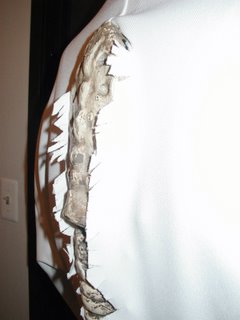
Here are a couple of pics of the back of the costume and the exposed spine. It looks good but I think it would have been better if I made the ripped up edges shorter and maybe singed some of them with a lighter.


Here is how it looked from the front. Something you can't see is that on my right side I have a small skull that I added battery powered lights to the eyes and have hanging from a rawhide strip off of my belt.


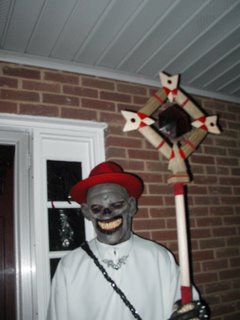
I spent some time outside at the front door acting as a doorman. I would stand perfectly still and people thought I was a prop. As they reached for the door handle I would scare them by saying "Welcome" in a deep voice and open the door for them. I later overheard one man tell his wife that if I had reached out and touched him instead of the door he would have ran off leaving her with me and whatever fate I had in store for her.


Me standing inside having a conversation with one of the other party guests, her husband is in the background. (all names withheld to protect the innocent).


Notes/Issues:
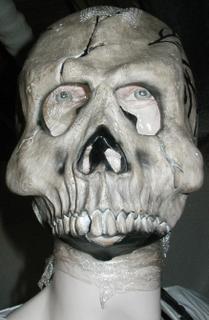
Its obvious that the mask is too large. It looks neat and since it is larger than normal adds to the strageness but is not perfect for what I wanted.
However I think I may have been lucky by being forced to use this mask. I found that the mask was very hot and when I'd step outside to cool off, my breath would condense on the inside of the mask and run down into my shirt because the mask was long and tucked under the robe. This was because there was no air hole in the mask around the mouth. This also meant that I was not breathing in fresh air and kept rebreathing in a mix of stale air along with whatever new air did circulate in. This left me feeling a little out of breath when I had the mask on. So I had to take the mask off every so often to air out (and get a drink).

If I had used my original mask that was going to be glued on I would have been left with a puddle of moisture on the bottom of my mask that would have been nasty. So that will be one more issue I'll have to solve for next year.

I like the gloves that I found since they have the bones sticking out and I didn't have to do any special work for them.

The robe sleeves are too long. I'll have to shorten them.

Wednesday, November 02, 2005

Results of the Staff

Well I spent quite a few hours sanding and polishing the gem.
I used a buffing attachment fitted onto a hand drill and clamped that to the base of my drill press. Thoughts about buffing plastic: As a general rule plastic does not dissipate heat well so unless you are careful you could cause parts to melt. Use your bare hands whenever possible when buffing because if it gets too hot to hold then you need to stop buffing and let it cool.

In between letting the gem cool I painted the staffhead.

When I originally poured the gem I placed some fishing line at the top, bottom and both sides with the idea of using it to hold the gem in place on the staff. This turned out to be useless. First, the line does not bind with the resin so it can be easily pulled out. Second, since it does not bind with the resin, the line has a different refraction than the resin so, as light passes through the gem it hits the line and is reflected differently. This causes the line to show in the gem. Third, as I sanded the gem I was not able to cleanly sand around the line and keep the shape of the gem so I ended up having to cut it and sand/buff over it.
There is still some of the line in the gem. I just tell people that its human hair caught up in the process of shaping the gem from their blood.

I finally decided that in order to attach the gem I was going to have to give up the idea of trying to make it look like it was suspended in the staff head.
I figured that I could go with the wire wrapping technique that some people use in jewelry. It worked for the moment but it wasn't perfect. Note: the gem stayed in the headpiece until I got it home where it promptly fell out :)


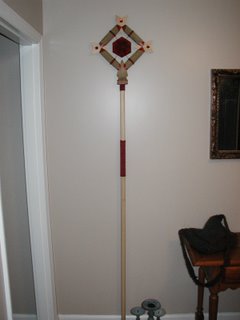
Here is how the headpiece looks attached to the staff. Its simply a 6' piece of 1-1/4" closet pole. I would have preferred something around 2" in diameter but was not able to easily find one.
Note that the bottom piece looks a bit large for the staff cause I originally sized it for a larger diameter. If I'm able to remake the staff I'll have to adjust things accordingly.


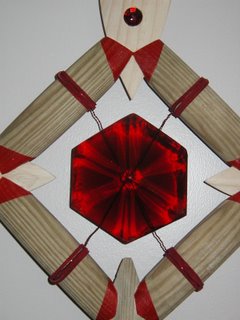
How the staff looks as a whole. I used some red leather rawhide and wrapped it around the staff at the juncture point of the headpiece and lower as a handwrap.

Tuesday, October 25, 2005

Headpiece and more...

Ok, so while I was waiting for the gem to set over the weekend I worked on a couple of other things.

I cleaned up the tongue on the belt sander. (works ok as long as you don't let it heat up)

I also worked on the headpiece. I wasn't sure how to fit the pieces together and make sure that it kept its shape. So I made a printout of the headpiece and placed it on a piece of plywood.
I then added some nails in the right locations to create a crude form.

Then add some wood and glue and viola. Notice the small plastic gems I added to cover up the holes that are evident in my previous post showing the sample layout.
It took a while to get it to this point because there was a lot of trial and error with the fitting of the pieces. I had to sand a little, then test the fit, sand some more and repeat.

If you look at the two ends of the pieces at the bottom you will see that they do not match up well. This is result of sanding these pieces with only a little experience and being in a bit of a rush. I point it out hoping that you avoid my mistakes and take your time if you try to do anything like this. (btw, I will be able to hide this flaw later.)

I'll add the bottom to the headpiece once this glue is dry. I can't add it now because its depth is greater than the other pieces and would throw off the layout.


I also worked on another piece of the outfit. What you can't see in the original picture of Malaise that I posted is that his spine is protruding from his back. So I need to make something for this.

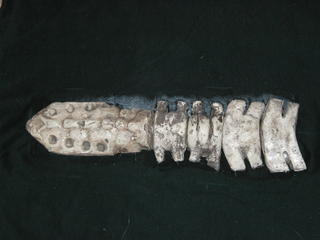
I purchased a 'Bag of Bones' and used the parts to create a spine. Actually these bones were fully formed pieces so I had to take them and cut them in half.
I did this so that I could mount the pieces and have them look like part of them was protruding.


These bones are made out of styrofoam and covered with a plastic paint. I mounted them onto a piece of shaped scrap cardboard with glue special for the foam and is similar to white craft glue.
I then made sure to color the cardboard with a black marker to cover up any mistakes from the next step.

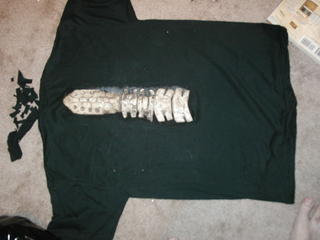
I then inserted the 'spine' into a black t-shirt that I plan to wear under my robes. I initially cut the shirt with a basic "I" incision. I then took the two halves and cut them to closely outline the spine. I glued the shirt to the cardboard using simple white craft glue.


What I will do is to cut the robe and fray the edges of the cut so that the spine pokes through but not as cleanly as it does in the t-shirt. I can use white glue to actually 'hem' the robe so that the cloth doesn't unravel. It will make the robe stiff where it is applied but if used sparingly it will not effect the fit or flow of the robe and easier than trying to sew a hem.

Monday, October 24, 2005

Time to make the 'gem'

OK, time to get the mold ready.
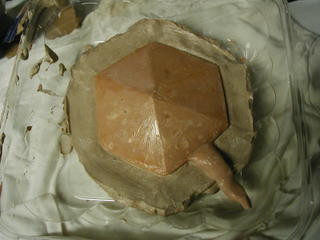
Removing the original clay gem from the mold went pretty easily.
The down side of using Vaseline is that the uneven coating you get with it transfers to the mold shell. !! BIG MISTAKE !! - NEVER USE VASELINE as a mold release agent. It works but produces CRAP!
After cleaning off the extra Vaseline I had to put the mold in the oven at low heat (~170) for about 2 hours. I wanted to make sure that the mold was completely dry and the inside surface was still damp. Plaster achieves over 95% of its strength in the last 10% of its drying and it is a sharp increase of strength, so if it was only 70% dry then it would only have about 20% of its strength.
After trying to sand the inside of the mold to smooth out the Vaseline marks, I put it back together. I realized that there was some small gaps in the mold and so I used the clay from the prior steps to make sure and seal the mold.


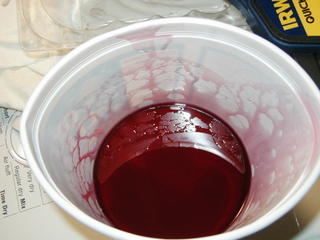
I then made my mix. First making a guess as to the amount of resin I'd need (25 oz) and add the coloring. Once that was mixed I added the hardener. I then filled the mold and tossed the extra. !! BIG MISTAKE !!
I needed to wait for the resin in the mold to settle and add more to the mold before I was done. So, I had to run out to the dumpster and retrieve the bucket.

This is what's left after my pour.


I started this Thursday night and Friday night I removed the leftovers from the bucket. It was still a little soft and I could leave my fingerprints in the resin.


Well I waited till Saturday to remove the gem. One half came off easily enough but the other half had to be broken off. It seems that I didn't put enough of the silicon spray on one side (in place of the Vaseline).


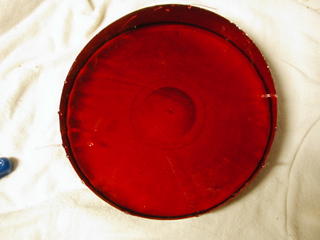
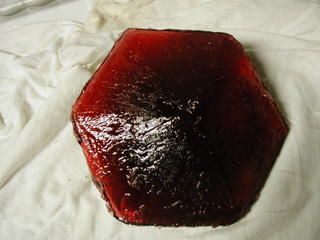
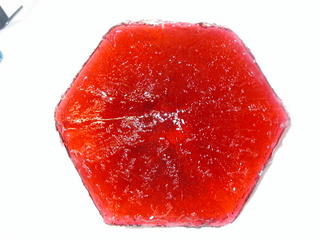
Well the gem was still soft on the surface. Since its been cool in the basement I decided to put the gem in the oven to test if the increase in temperature would help the chemical process. I left it in there for about 5 hours at ~150. I'm not sure if it helped. It was finally solid by Sunday night.
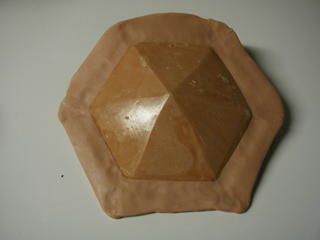
Below is how it looks. Like crap. The second picture was taken with the flash.


Well, as this was setting over the weekend I turned to finishing up the staff head and more.
Later will come the sanding and polishing of the gem.

Tuesday, October 18, 2005

Ok... now start the staff Part 3

So, when the thought crosses your mind that you want something that is made out of wood do you contact someone that you know already works in wood? Someone that has thier own woodworking shop (and may let you use it if you ask real damn nice)? Someone that actually makes money by creating cool things in wood?

Well, you might; but not me. I'll bust my ass trying to slap something together in my basement. This is just another example of my mind not working in my best interest.

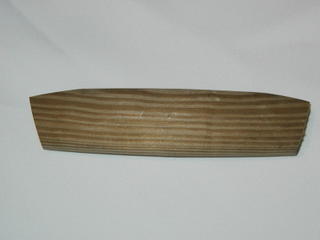
So, here we go again. I first created what I call the cross pieces. I took a banister pole and cut off the ends and then shaped it.


Then to create the 'points'. Throughout this project I was hoping to be able to take something and modify it instead of having to create from scratch. It would save me some time and thats always a good thing.

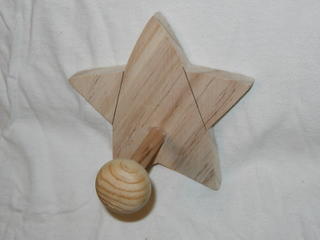
I found this star shaped wooden coat peg that would normally be attached to the wall.


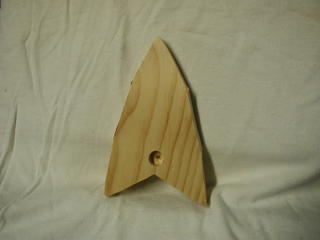
Then, remove the peg and cut off the 'wings' and I'm almost there.


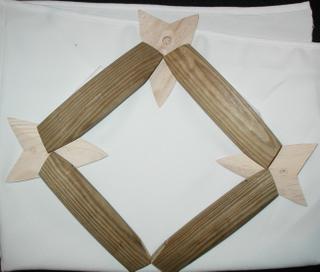
After some cleanup the sample layout looks like this:


Now I just need a little more work on it and it will be ready for the gem.

Ok... now start the staff Part 2

Ok, I now had a gem to use as a template. Obviously this looks nothing like what I want since it just looks like shaped clay.

Now comes time to make the mold.
I started by trying to use the latex I already had since that is known to work. Well it didn't work for me. The stuff took too long to dry and I had to apply so many coats to get a mold that was thick enough to keep its shape and be able to be used.
Next I looked at a gel substance that they use in the Memory Hands keepsake kit. It looked like it may work and it was quick setting. Little did I realize how quick. My first attempt at using this stuff was a disaster. It says on the box that it sets in 3 minutes and they are not lieing. It started setting even before I could get the gem completely covered. Its designed for one person to mix as the other people have their hands ready to be molded. My second attempt worked much better but then I found that I couldn't get the mold apart properly to remove the clay gem. The gel would flake apart too easily.
I can't complain about the product itself it really wasn't meant to be used the way I was working with it and just wasn't going to work for me.
Finally I threw in the towel and went the traditional route.
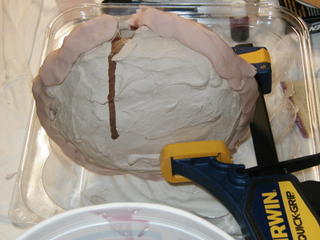
First I added a clay wall around 1/2 of the gem. This is going to allow me to create 2 separate halves of the mold.


Next I covered the entire half of the gem with Vaseline. This acts as a 'release agent' and will keep the plaster from sticking to the gem. Note that they make professional release agents but I wasn't able to find any locally and for what I need this will work. Don't use this if you make something with a lot of detail.
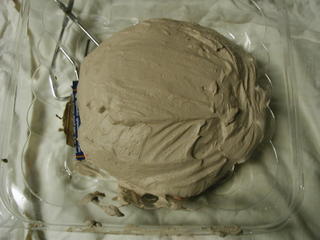
Then comes the pouring on of the plaster.


Once it sets I removed the clay separation piece and covered the other side with Vaseline. This includes the set plaster because you want to try and keep the two halves from sticking together.
I also added the little piece of clay to keep an opening because once I am done and have removed the clay gem I need a spout to be able to add the material that will become the gem.


This side has been covered in plaster(not shown) and I'll know tomorrow when its set if I've done this correctly or not. The real challenge comes in trying to separate the two halves of the mold to get out the clay gem without damaging them.

Once I have the mold complete I'll do some light sanding to make sure everything is smooth inside and then I will be using Polyester Casting Resin that will be tinted red to make the gem.

Oh and in case you are wondering the standard 12 sided gem is technically known as a bipyramid polyhedron

Ok... now start the staff Part 1

I think that next to the makeup to complete the mask effect; creating the staff is going to be the toughest part.

Its really a headpiece on a simple pole so obviously the pole will not be an issue here.

I started making the gem for the center of the staff. I had many ideas on what I wanted it to look like but most of them have been shelved for the sake of time. Mostly because the work I've been putting into it has proved to be a large series of setbacks and delays.

First I tried to see if there was some large plastic gem from some child's toy that would work. Unfortunately that was a fruitless effort. While I had fun looking around the local Toys'r'us it wasn't going to pan out.
I was also looking for something that was the shape I needed even if it was made from another material. If it was hollow I could use it as a mold and if it was solid I could use it as an 'original' to create a mold around. Well it turns out I wasn't lucky at all and this was going to have to be done the hard way.
So, I finally broke down and bought some clay and wire mesh. But wait... how big do I make it and what proportions should I use? Well I sat down with Corel Draw and started to map it out.

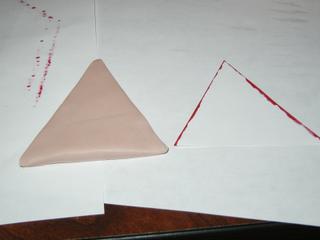
This is the size of the facet that I came up with.

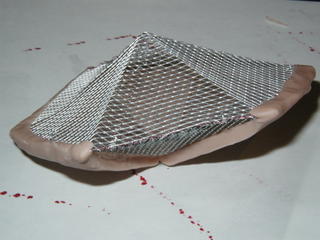
I eventually found the size I wanted and was able to create the wire mesh form for it.

Note the lack of anything in the middle of the mesh. BAD IDEA! I was up late when I made this and didn't realize how much abuse this form was going to take before I was done. It stood up well enough but would have been better with something inside like a wad of mesh(NOTHING THAT WOULD BURN!!). Or even just use a large ball of clay and cut out the basic shape of the gem and then finish it.

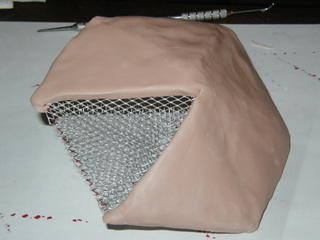
Did I mention that I've only played with clay once before? Sure I've had my fun with PlayDoh but that is nothing compared to this since I needed to get this right the first time.

Once I was done I noticed that it was ALL lopsided, so I started to straighten it out and that started to make it worse since the amount of clay I put over the mesh varied and the mesh started to show through.
So I slapped on some more clay to cover up the bald spots and dropped it into the oven. This clay is oven baked so that's why you cant use anything that would burn in the center. The good thing about using this mesh form was that it was thin enough to only take about 15 minutes in the oven to bake. The following day I took the gem and applied it to my small tabletop belt sander and was able to salvage something out of it.

Slip in a little tongue

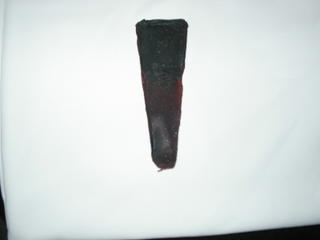
Ok, I've gone and made the tongue. It wasn't that difficult.


All you need to do is make a basic mold out of aluminum foil and pour in some liquid latex rubber. You can get the stuff from an art supply stores like Perls or Michaels.
You'll most likely want to add some food coloring because its usually off white like surgical gloves can be.

Now all I have to do is trim it up and shape it a little and I'll be able to attach it to my neck using spirit gum. Note: I'll be covering it in Vaseline to give it that nice slimy look.

Thursday, October 13, 2005

Add a Fedora

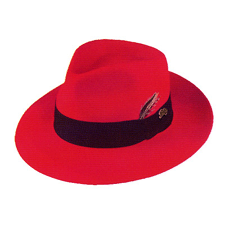
It is hard to tell from the first pic I posted but the headwear is a red fedora.
Why a red fedora? Who the hell knows really. I tend to think that Blizzard wanted to give omage to the latest Red Hat
I found one online and it should be here in a couple of days.


I'll have to find a way to nicely remove the black band since its not needed for the costume.
.. then I have to find a way to wear it on other days after Halloween cause $40 for a hat is a bit much for one day's use.

UPDATE: The hat has come in and looks good.

Wednesday, October 12, 2005

Lets start with the head

Well the first thing I had to do was take a long hard look at how my warlock, Malaise, looked from different angles and figure out what I could duplicate and what I couldn't.

I realized early on that one of the main features was going to be impossible and that was the knees and elbows. On the computer character the bones show through at the knee and elbow joints and trying to duplicate this and still have it look good was going to be too difficult with the time and budget I had.

So, the first thing I had to address was the fact that the lower jaw is missing on him. If you look closely you'll see that the tongue is hanging out of his maw.
What I needed was a mask that was larger than normal and could be modified, and I found it.


*dont mind the cut in the middle of the mouth. I took this picture after I started modifying it.

Here is the pic of how it looked like from the side


Once I cut the bottom off it looks like this. It does look goofy this way but thats just because of the positioning.


Once it's moved into position it looks much better...


Now all I need to do is add the right makeup for the neck area.

One last thing... a tongue... I have to make a tongue that will hang down now that there is no lower jaw to support it.

And so it Begins

I was informed one day that a very good friend of Glitzy's (and a nice person in her own right) was going to have her house warming party by combining it with a Halloween party.

We had been invited to attend and it seems that she wanted me to help with the decorations.

Well, we decided to attend the event which it just so happens is in North Carolina.

So, now comes the tough part. What costume am I going to wear?
I can go with something off the shelf but that would be too generic.
I could wear my old chain-maille shirt and accessories and go as a medeval mercenary but the shirt itself weighs 50 pounds and is tough to wear for long.

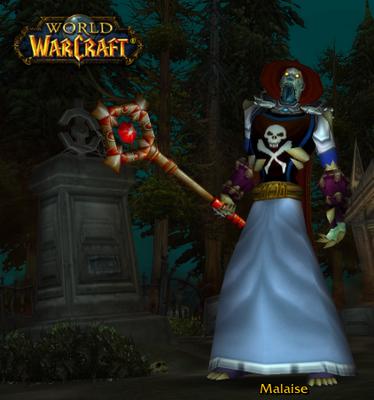
Eventually I decided that I'd go as my warlock from World of Warcraft. Below is a picture of it.
I'll be documenting what I did to make the costume here and if I'm lucky I'll get it done in time.